Unity UI Tips: Canvas Sorting Order
If you’ve been dealing with Unity UI for a while, it’s very possible that you’ve had to interact with the Canvas component sorting order.
Maybe in that rushed Game Jam project that you just threw “999” in there, or maybe in a more serious project that you actually tried to follow some rules for modifying it. The fact is that modifying the hierarchy sometimes is simply not enough.
So this leads to the question: how can we modify the Canvas sorting order in a reasonable and maintainable way?
Here’s how I’ve been dealing with it.
Implementation
First, we need to give names to our sorting layers. Magic numbers are really bad for maintainability and they make it harder to understand what’s going on, either in code or in the Unity Inspector.
To address this, let’s create an enum to assist us. I’ll also add some values here for demonstration purposes, just make sure to change them to something that makes sense to your project.
Naming layers
// CanvasId.cs
public enum CanvasId
{
    LoadingScreen = 1,
    HUD = 2,
    Fullscreen = 3,
    UIEffects = 4,
}
Quick tip!
Always give numeric values to your serializable enums.
This prevents unexpected changes when renaming enum members.
This is already pretty helpful, you could just go and refactor your code to use the enum values for the sorting orders, this way we’ll be avoiding magic numbers.
But we can do better!
Ordering layers
Let’s create an ScriptableObject to make it easier to modify our sorting orders.
// CanvasSortingOrderSettings.cs
using System.Collections.Generic;
using UnityEditor;
using UnityEngine;

public class CanvasSortingOrderSettings : ScriptableObject
{
    const string ASSET_NAME = "CanvasSortingOrderSettings";

    public static CanvasSortingOrderSettings Instance
    {
        get
        {
            if (instance == null)
                instance = Resources.Load<CanvasSortingOrderSettings>(ASSET_NAME);
            return instance;
        }
    }
    static CanvasSortingOrderSettings instance;

    [SerializeField]
    List<CanvasId> canvasIds = new();

    public int GetSortingOrder(CanvasId id) => canvasIds.IndexOf(id);

    [MenuItem("Assets/Create/Canvas Sorting Order Settings")]
    public static void Create()
    {
        CanvasSortingOrderSettings asset = ScriptableObject.CreateInstance<CanvasSortingOrderSettings>();
        AssetDatabase.CreateAsset(
            asset,
            $"Assets/CanvasSortingOrder/Resources/{ASSET_NAME}.asset"
        );
        AssetDatabase.SaveAssets();
        EditorUtility.FocusProjectWindow();
        Selection.activeObject = asset;
    }
}
If you’re unfamiliar with ScriptableObjects, they’re used exclusively to store data; in this case we are storing a list of our CanvaIds.
This script also adds a new MenuItem to create an instance of this ScriptableObject. Make sure to create this instance before proceeding.
The most important function here is GetSortingOrder(CanvasId id), and it’s a pretty simple one, it just grabs the index of that CanvasId inside our canvasIds list. This is the value that’ll be used later as the actual sorting order.
It should look like the image below after adding your elements:
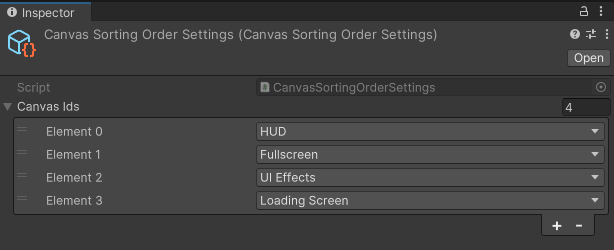
Now you can reorder your sorting layers easily by just moving the values up or down in the list!
Using an old Unity version?
Unity versions prior to 2020 didn’t allow for reordering list elements by default.
In this case you’ll need a custom editor to support reordering. Unfortunately it won’t be covered in this article.
Applying modifications
Now we just need to apply our named sorting layers to our canvases.
Let’s do that with a new component:
// CanvasSortingOrder.cs
using UnityEngine;

[RequireComponent(typeof(Canvas))]
public class CanvasSortingOrder : MonoBehaviour
{
    public CanvasId CanvasId
    {
        get => canvasId;
        set
        {
            canvasId = value;
            Canvas canvas = GetComponent<Canvas>();
            canvas.overrideSorting = true;
            canvas.sortingOrder = CanvasSortingOrderSettings.Instance.GetSortingOrder(canvasId);
        }
    }

    [SerializeField]
    CanvasId canvasId;

    void OnValidate()
    {
        CanvasId = canvasId;
    }
}
Now you just need to add this new component to your Canvas and modify the sorting order through the inspector drop down. It also allows you to edit the sorting order through code too, just remember to access the CanvasSortingOrder component instead of the Canvas one.
// bad - this won't consider the order you've defined in your CanvasSortingOrderSettings.
GetComponent<Canvas>().sortingOrder = (int)CanvasId.HUD;

// good!
GetComponent<CanvasSortingOrder>().CanvasId = CanvasId.HUD;
Conclusion
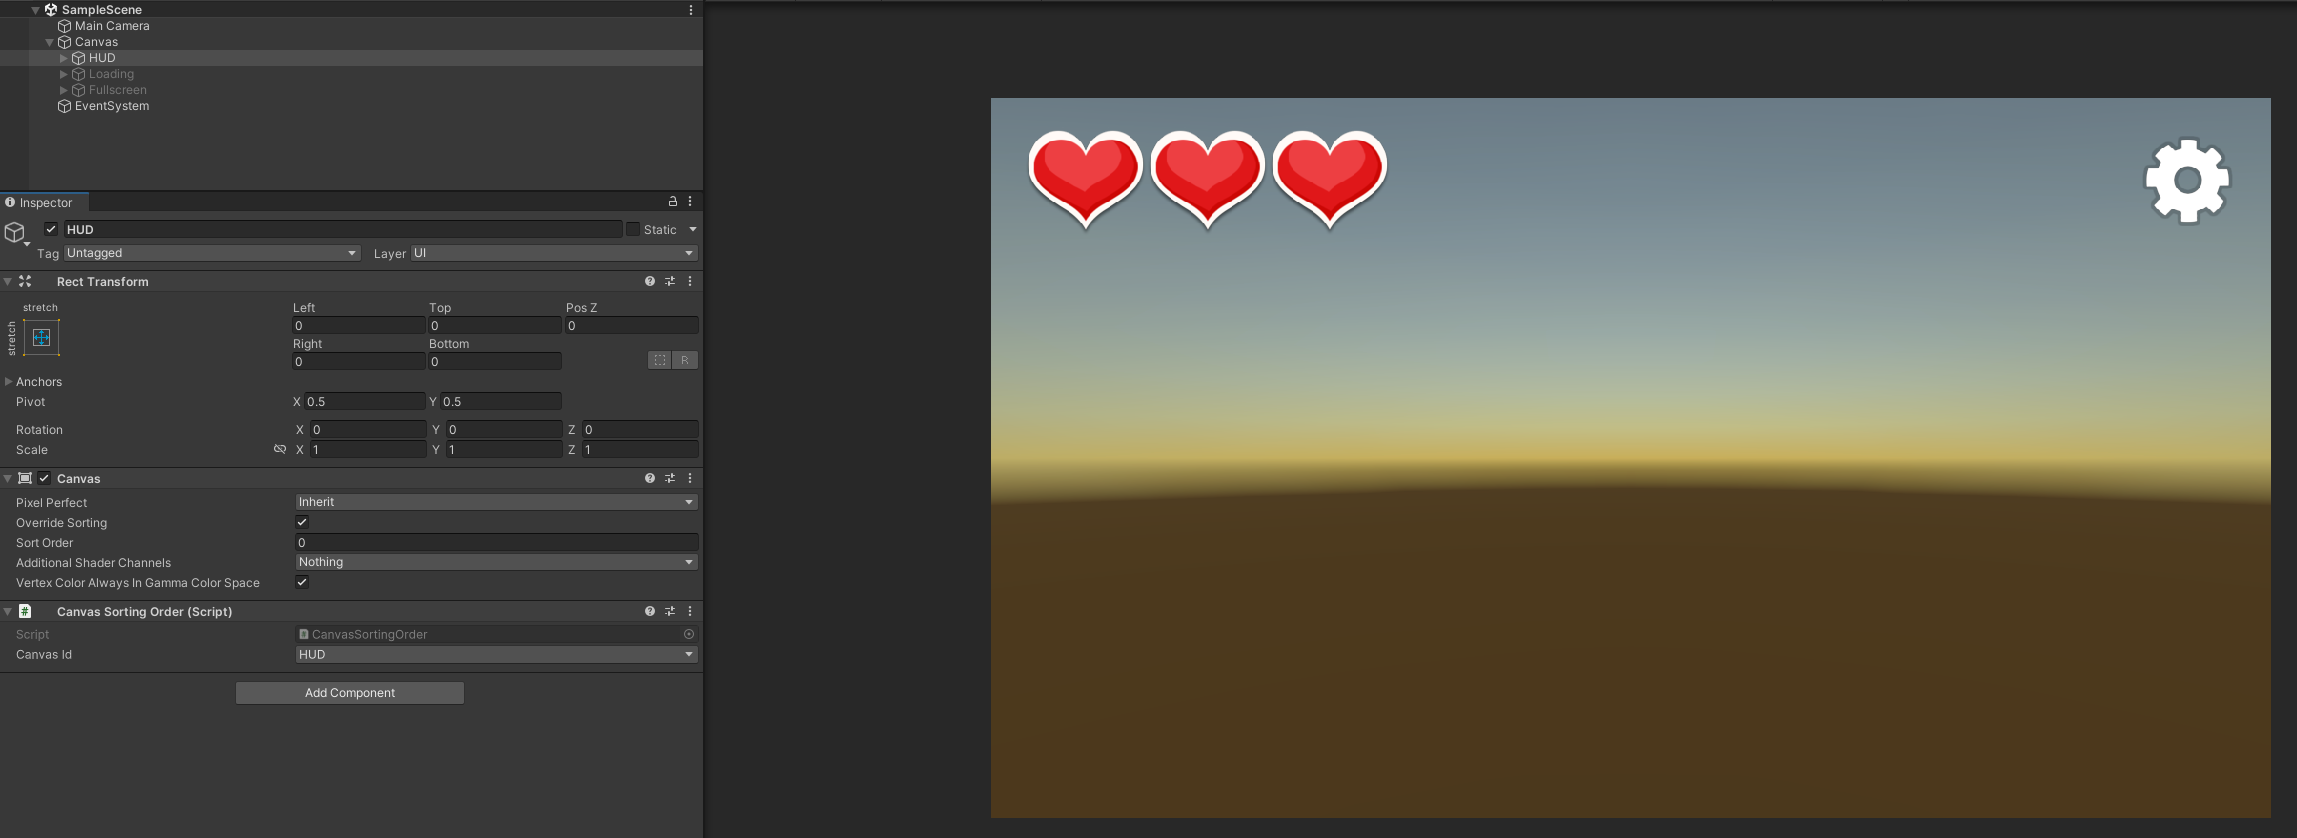
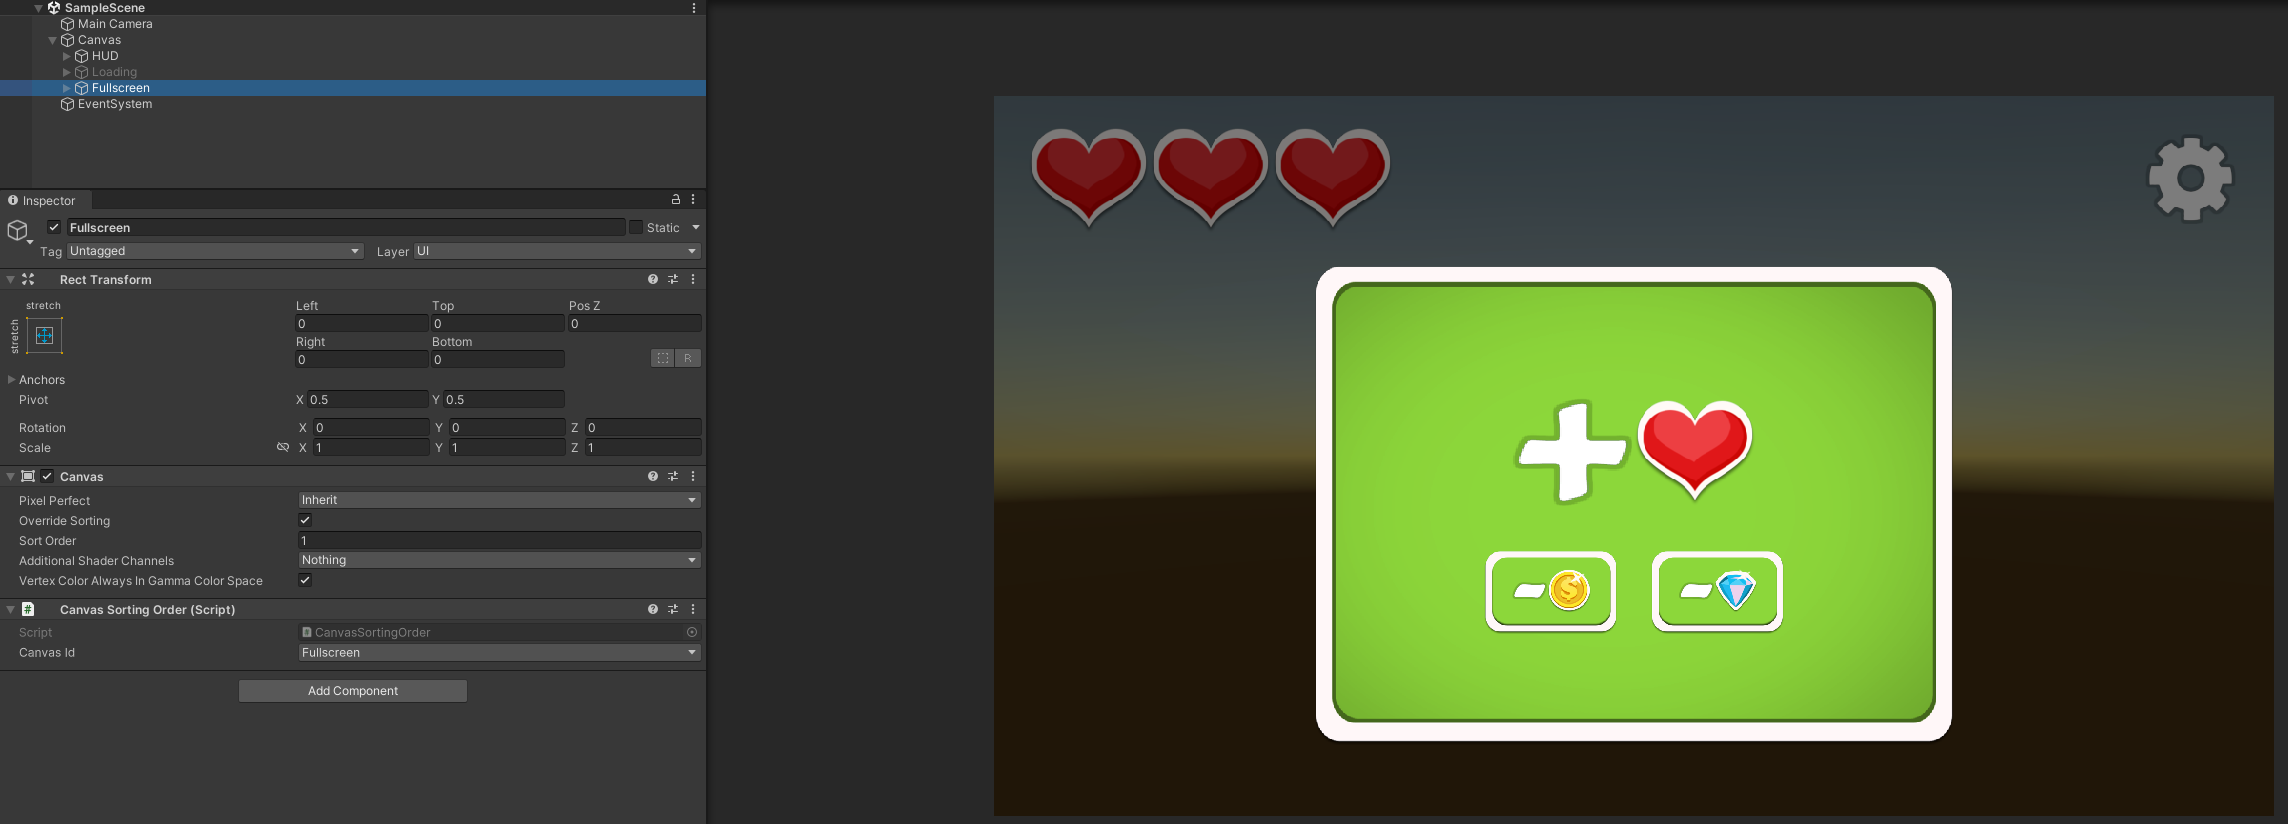
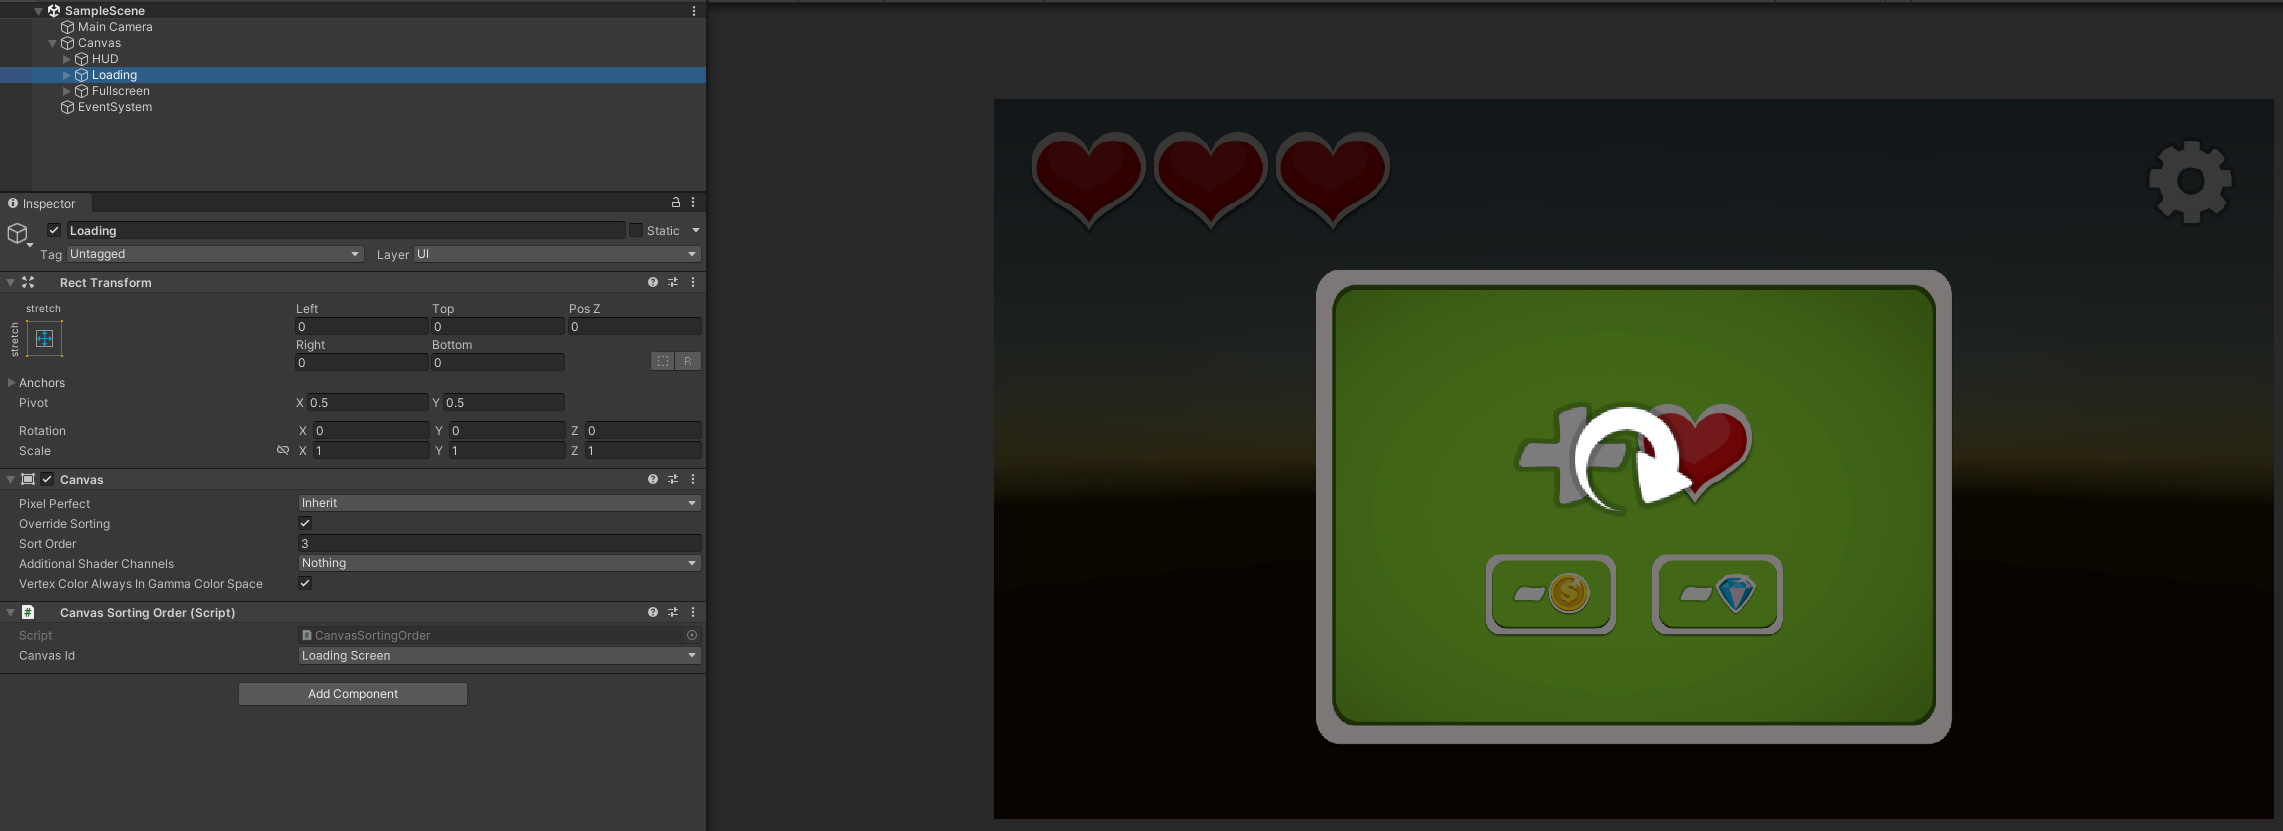
Check out the images below to see how it works in practice.
You can see the CanvasSortingOrder component next to each Canvas altering the sorting order. Notice that without changing the sorting orders, the “Loading” screen would appear below the “Fullscreen”.
To sum it up: now you can give names to your sorting order layers and order them through the inspector.
Be advised that this is a very bare bones implementation, it uses a Singleton and loads assets from the Resources folder, which may or may not be interesting for your projects. It’s also missing some treatments for corner cases, like placing duplicate CanvasIds in your CanvasSortingOrderSettings.
Make sure to tweak it to fit your needs!